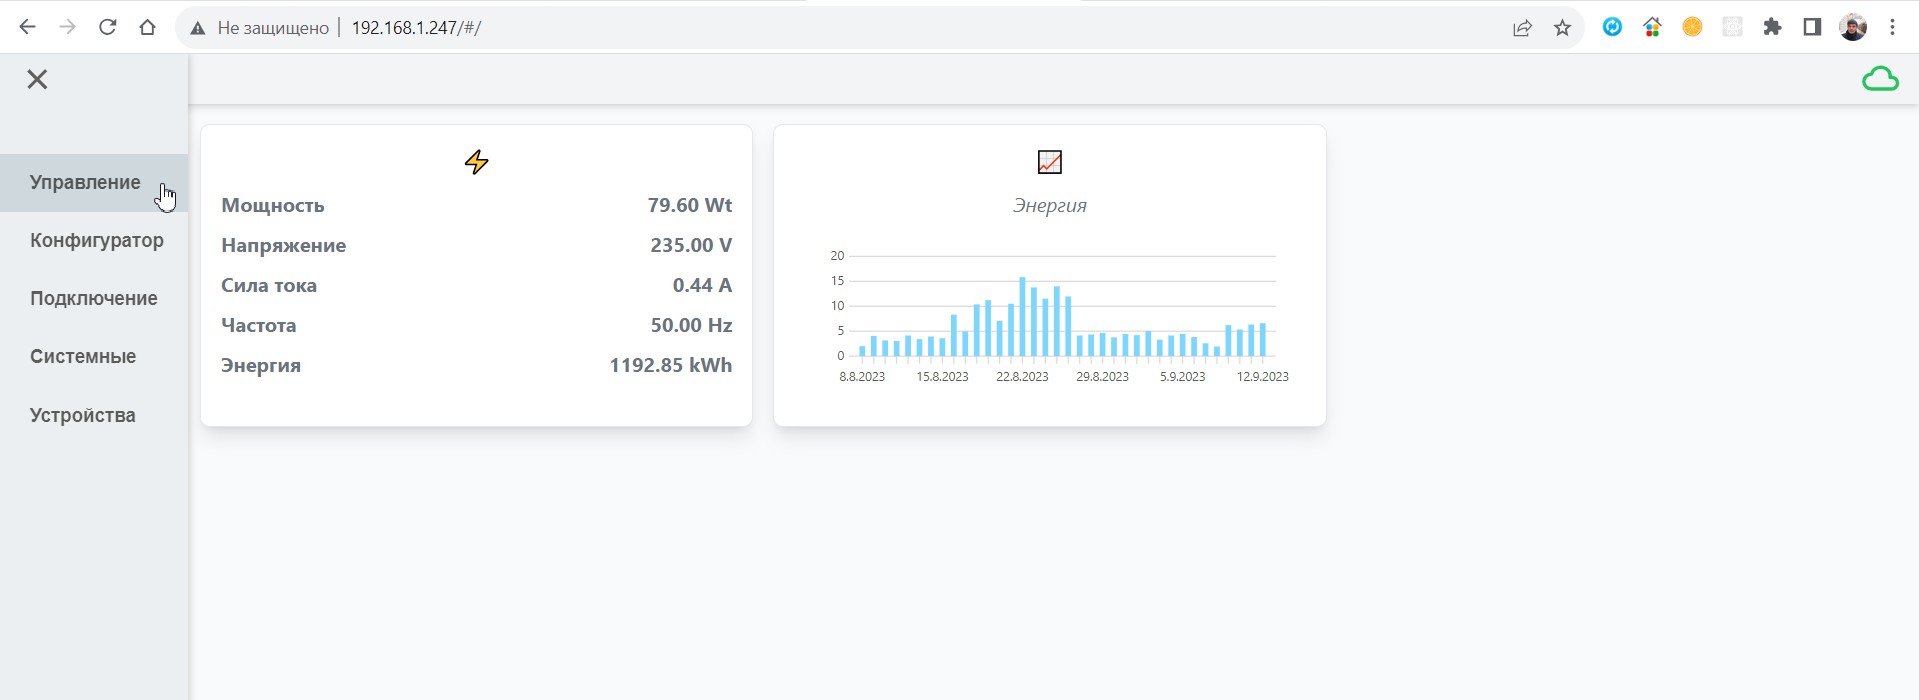
1. Dashboard control panel
On this page, you will see widgets from all your devices simultaneously. Buttons, input boxes, graphs, and many other elements created on your devices. The web interface combines widgets on the same screen from different devices and there is no need to navigate to different ip addresses.
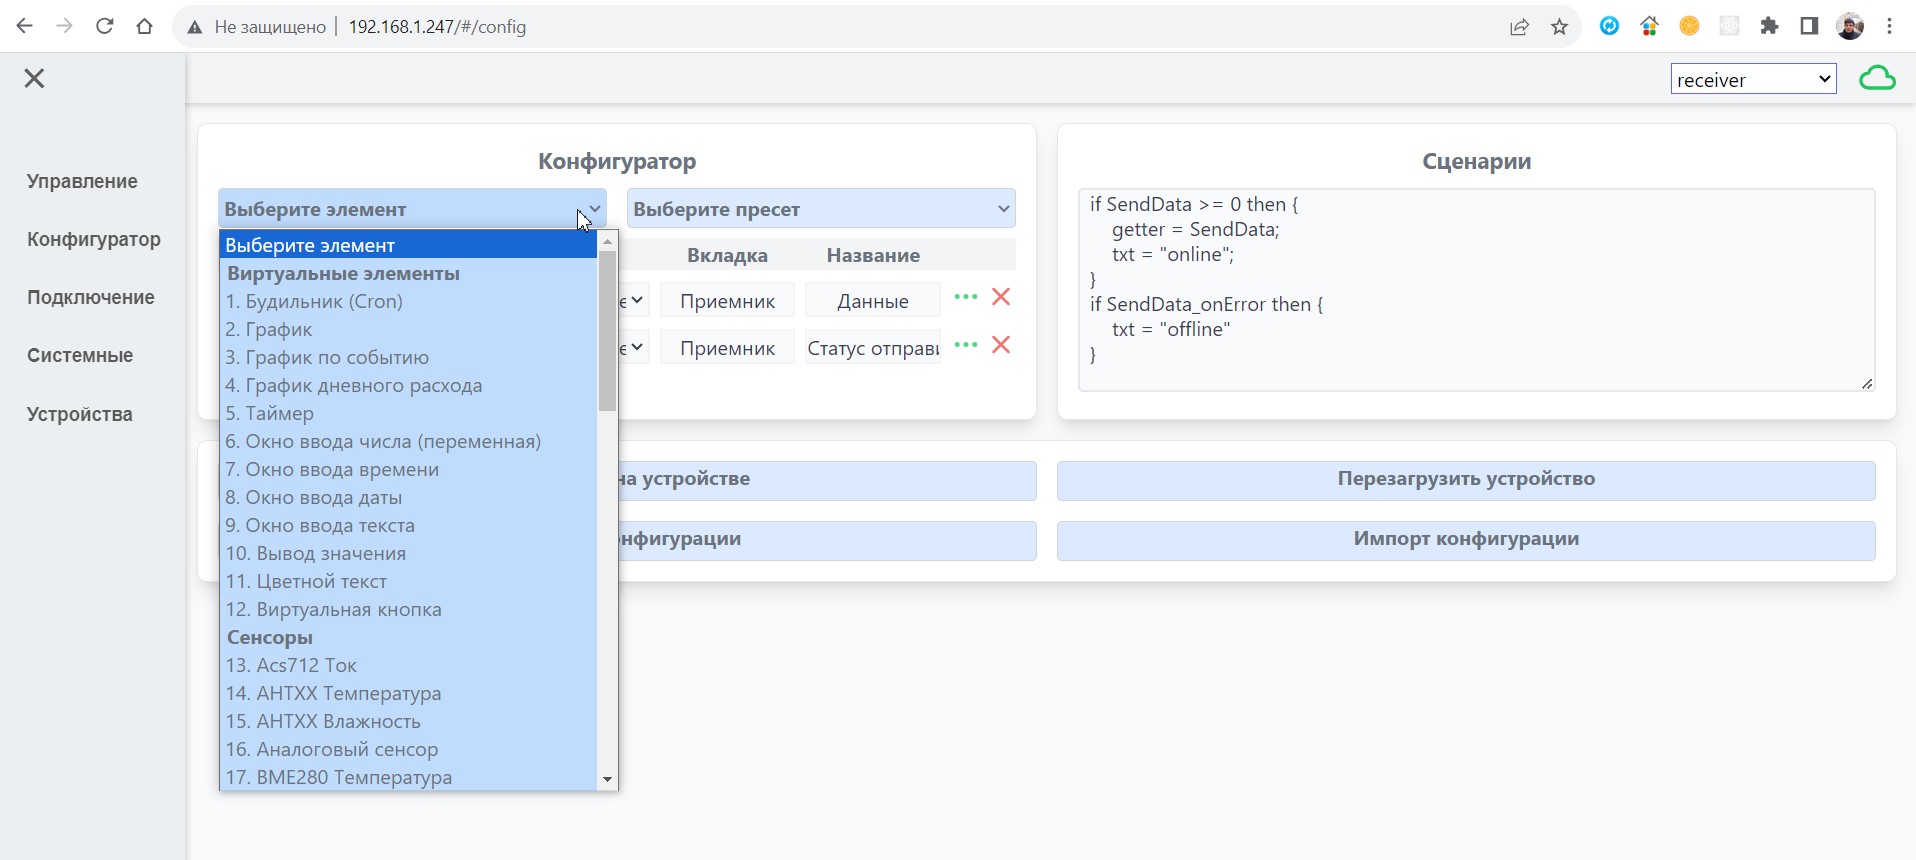
2. Configurator
This is the device settings page. The drop-down list contains elements of an automation system. Any automatic system consists of separate structural elements connected to each other and performing certain functions, which are commonly called elements or means of an automation system. You will be able to select the items you need from the list and they will appear in the table. Each element you select has configuration settings that you can change by clicking on the three-dot button. (…).
The second important necessary feature of any automation system is the ability to configure the relationship between its elements. To do this, a simplified scripting programming language is displayed in the web interface. This allows you to react to events and access elements, forming the system's logic. The built-in programming language will allow very flexible system configuration, as well as help you acquire basic programming skills.
In addition to the main goal, our project also has a goal learning programming and getting people involved in this process.
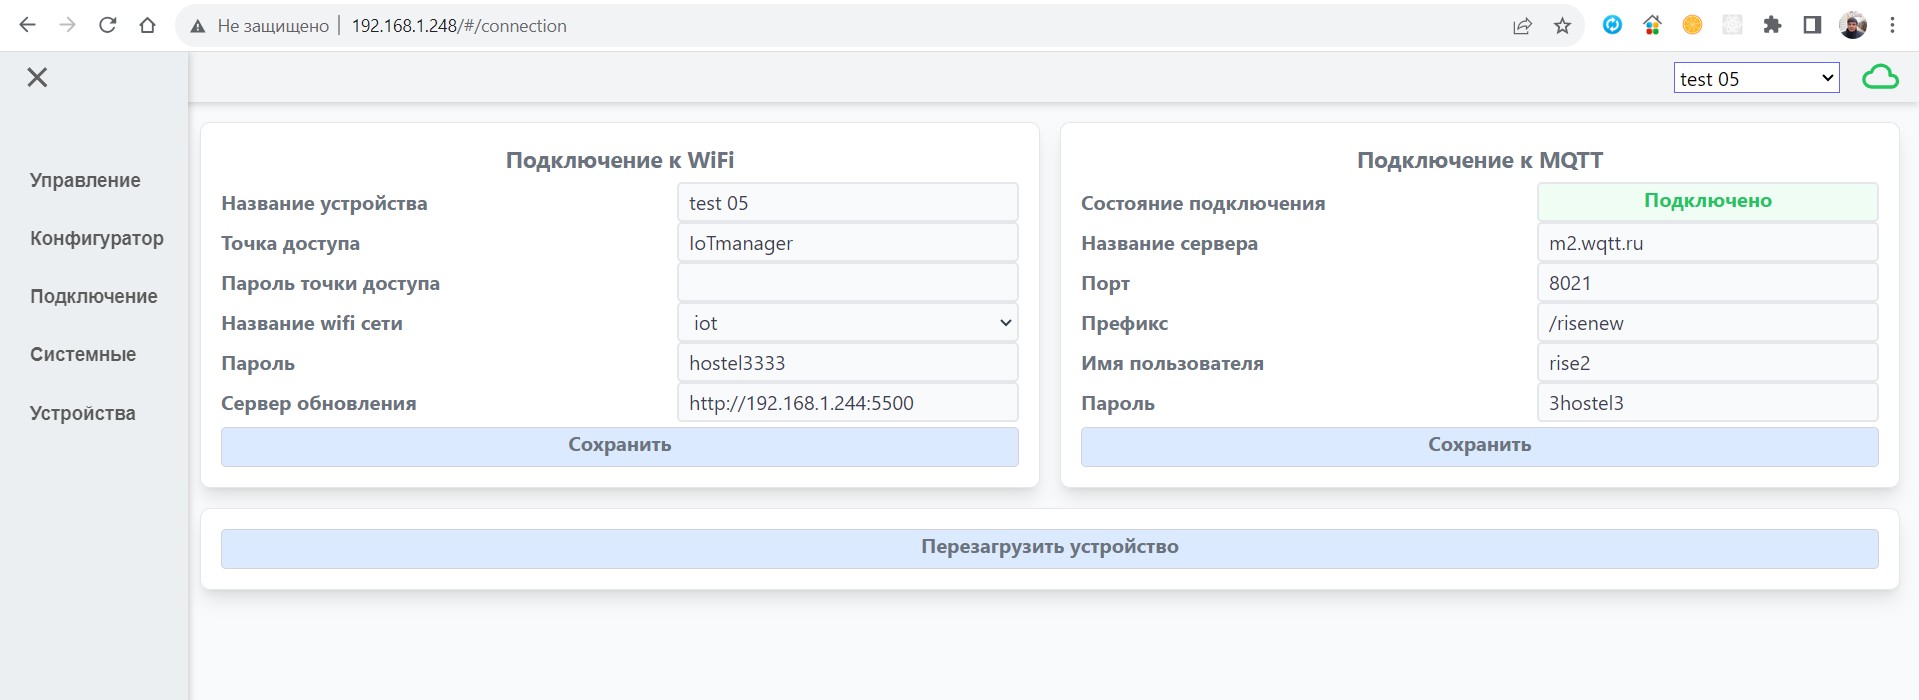
3. Connection
There are two sections on this page: connecting to WIFI and connecting to MQTT. With the first one, everything is usually clear, but with the second one, the question arises what it is, and why it is needed. MQTT is a standards-based messaging protocol used for communication between devices. In our project, there is a second independent way to monitor and manage the system — this is the IoT Manager mobile application. It requires MQTT to work. The second reason for using MQTT is for devices to communicate with each other. Our system uses network scripts that allow you to transfer control signals between devices. To use these two functions, you need to get an MQTT broker and enter its parameters in the window on the right. MQTT broker (or server) You can get it for example by registering on the site wqtt.ru.
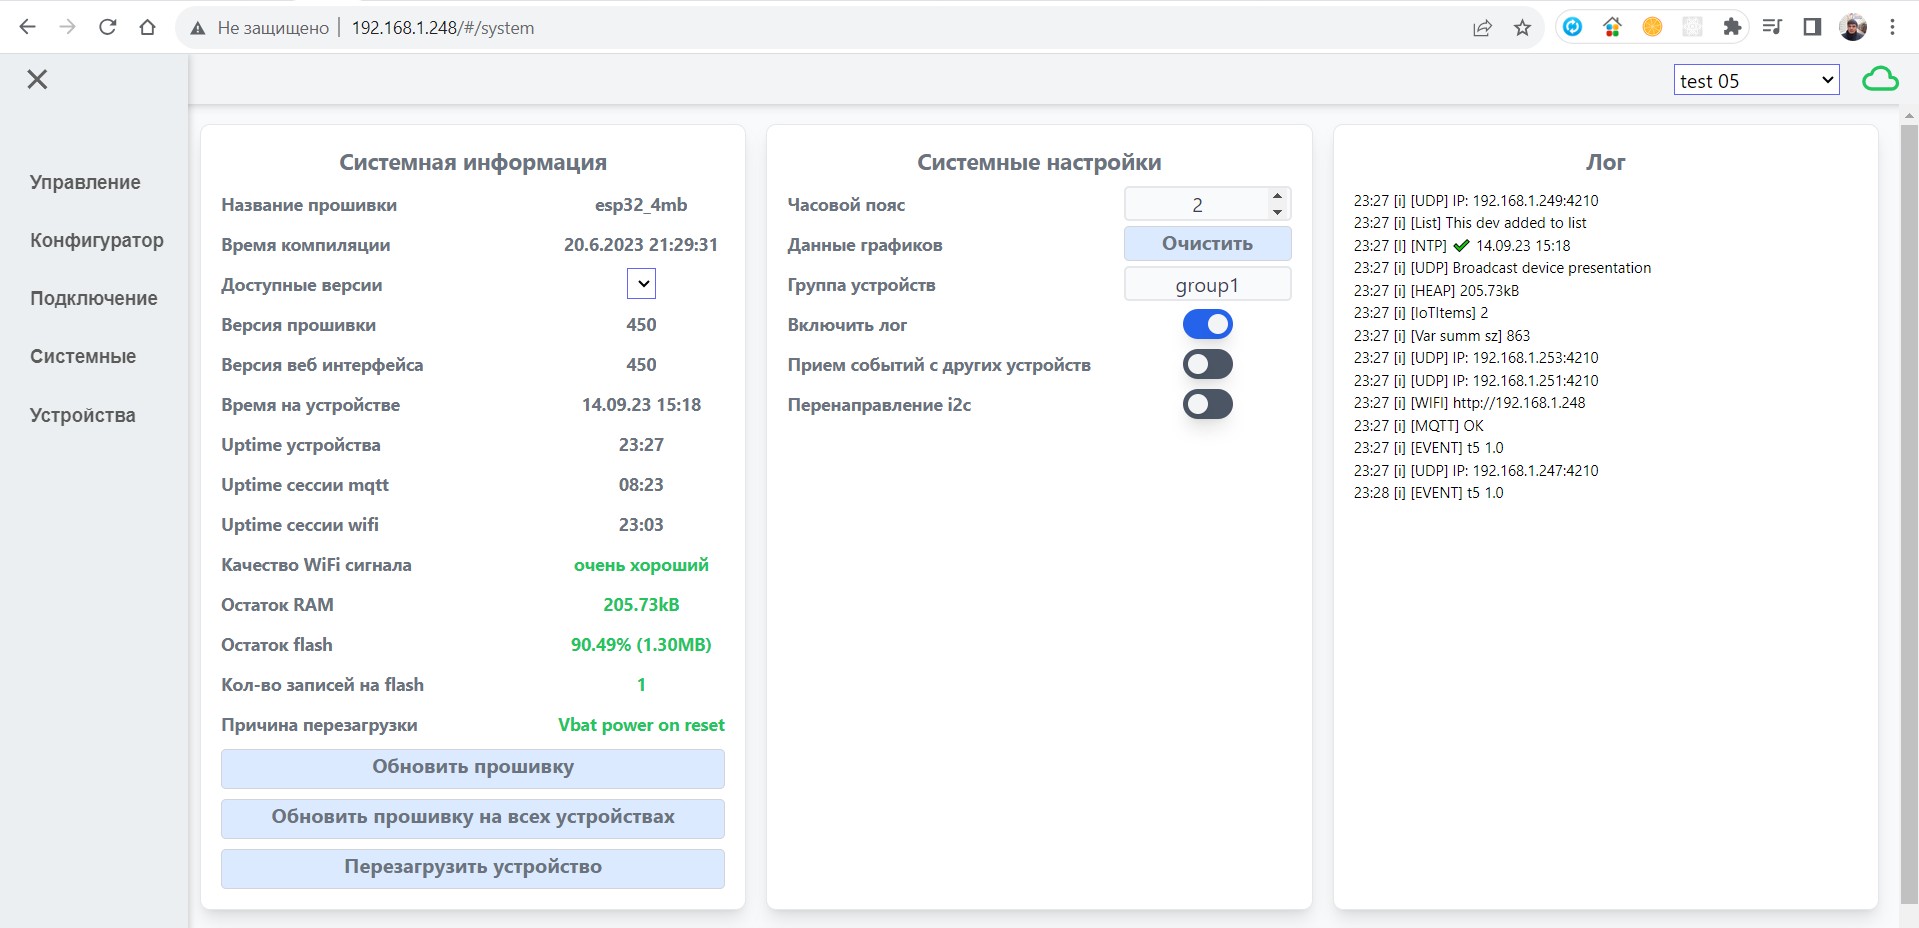
4. System Requirements
This section contains the device's system information. You can also make some system settings — time zone, clearing chart data, changing the device group. This setting affects the formation of widgets on the manage page. Devices from other groups will not be displayed.
On this page, you can specify:
- time zone
- clear history (data) from charts
- Set the "Device Group" device scope. You will only see events from your own group, and your ESP events will also be limited to that group. This will allow multiple independent ESP groups to exist on the same local network.
- enable the ability to receive events from another device and transmit your own. This will allow you to receive information from other ESPs with the same group as the current ESP and transmit your own to them. So far, only for MQTT. Without this, network scripts will not work.
- Enabling the log, redirects the log file to the web interface.
- i2c redirection, activates redirection to other ports of the i2c interface and can change the frequency of the i2c bus if you need to lower it for the correct operation of any device. Redirected GPIOs must be entered in the appropriate fields. The value " 0 " is ignored and does not include redirection.
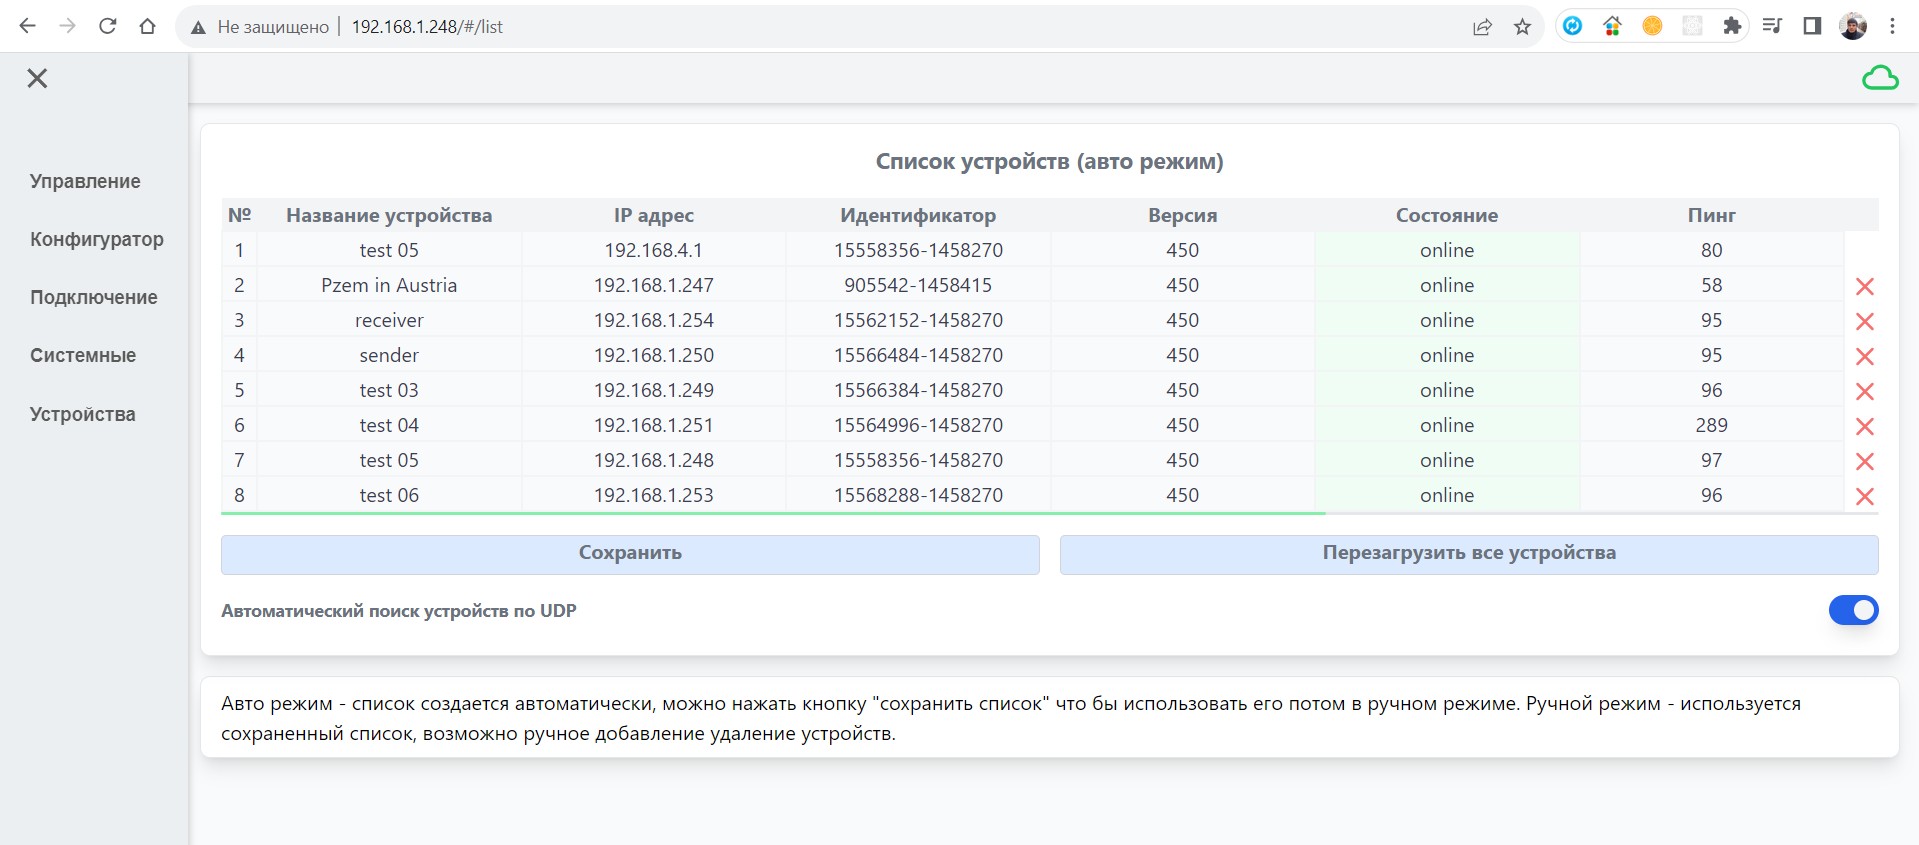
5. Devices
If you flash more than one device with our firmware and connect all the devices to the same wifi router, they will automatically appear in the list of devices. There is also a mode for manually generating a list of devices. You can click save while in automatic mode, and this list will be saved for use in manual mode.