
Since IoTmanager ver4 is constantly changing on a daily basis, you can install an up-to-date, relatively stable binary build at the address on this site follow this link.
If you are an active tester, know what Platformio and VSCode are, and want to customize the system for yourself, and maybe even change something in the code, then the following information is for you.
The current version for testers is available at Project's Github and also on Github Developers, where there are versions that are not yet merged with the main project, if you participate as an active project tester.
This page was created thanks to the efforts of a friend from our community @AEV_LAB
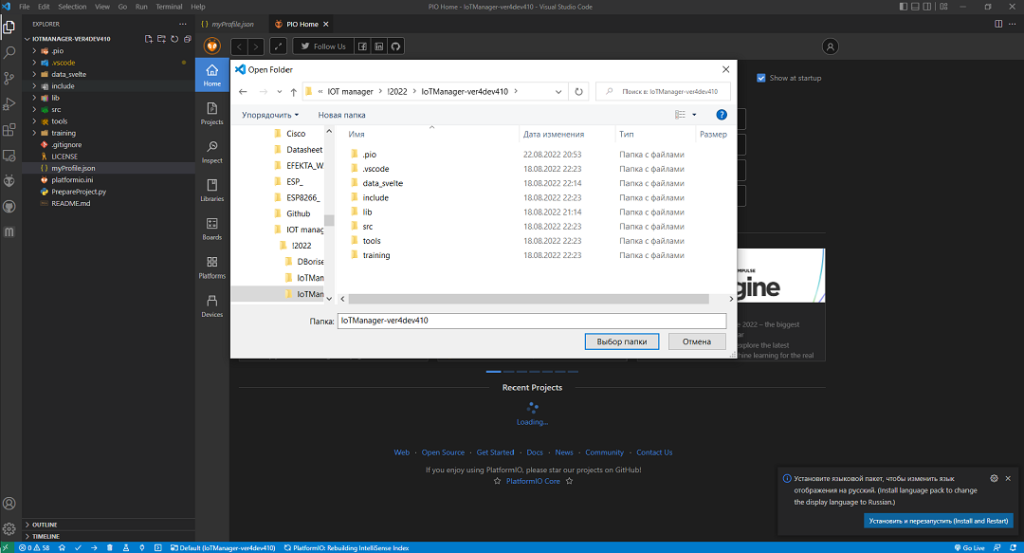
And so we download and unpack everything to the catalog. It is very good if there are no Cyrillic characters in the entire path starting from the root, this can save you a lot of time and nerves.
If you are reading and don't understand why to download and why not to set up synchronization with git, go to the other pages of this wiki, you have long outgrown this one.
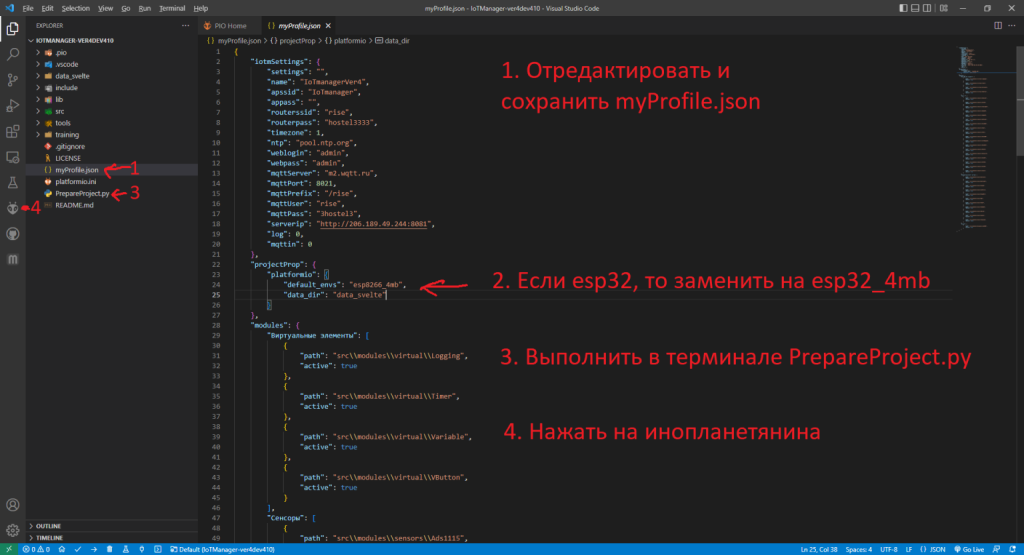
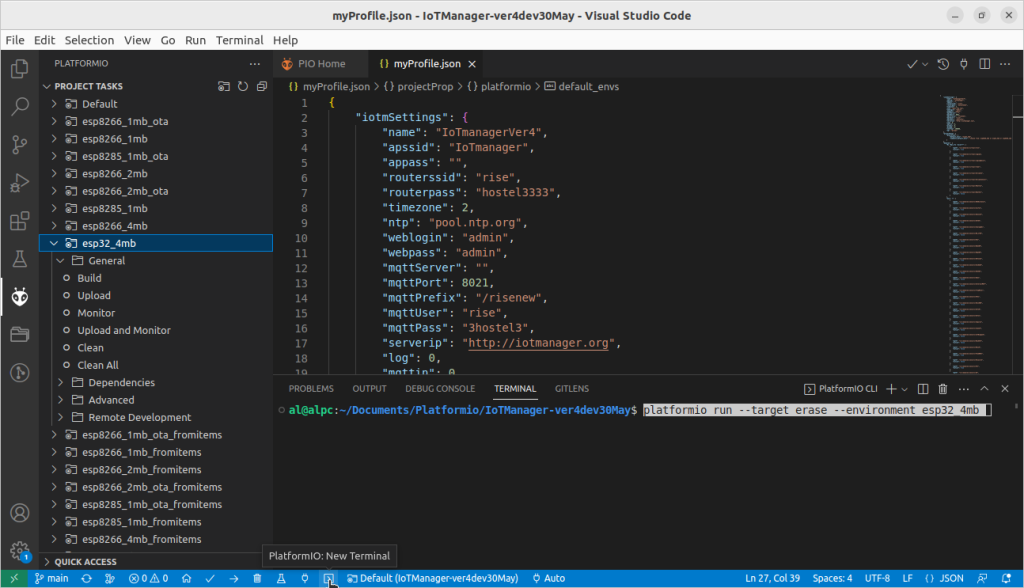
Compilation is performed in VS Code. For initial compilation scripts, Python is required. It must be present on your system and located in the path variable. After opening the directory in VSCode, edit the MyProfile.json file. Thus, you will specify all the settings of your home network, time zone, mqtt broker, if used, you can leave what is there for the test.
Also at this stage, you can choose which modules and sensors will be available in this build. After editing, don't forget to save the file to commit your changes. In the next step, run the file in the VS Code terminal window PrepareProject.py, which will load modules and sensors into the firmware. This is exactly what Python is for. If you want to rebuild an assembly, change network settings, or add/remove sensors or modules, also run this file. When PrepareProject.py works, data from MyProfile.json will be written in the appropriate place of the build. This makes it easier for beginners to build.
The sequence is shown in the figure below:
- Opening the file myProfile.json
- Editing network settings, time zone, and mqtt
- If we use ESP32, then we replace it with [env: esp32_4mb] in the appropriate place.
- The same applies to the esp8266_1mb_ota, esp8266_1mb, esp8285_1mb_ota and esp8285_1mb_ota chips.
- If necessary, use true and false to specify which modules and sensors we want in this build. Here everything is simple, we will turn on more, more memory will be used.
- Saving the file
- Run it in the terminal PrepareProject.py (right-click on this file and select Run Python File in Terminal)
- Click the alien icon (platformio) to display the compilation menu
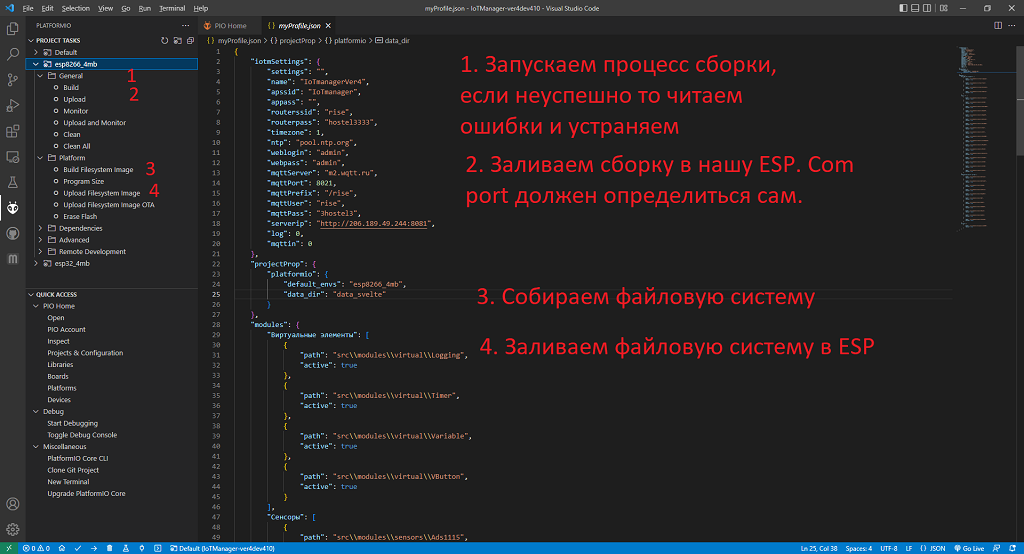
Compilation and firmware consists of assembling the firmware itself, at which point all the system modules are assembled and the created binary file is uploaded to ESP8266 or ESP32.
You must compile and flash the firmware itself and also the file system.
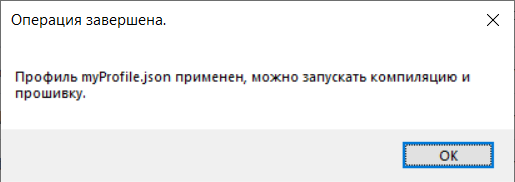
If the script works successfully PrepareProject.py a pop-up message appears, as shown below. If this doesn't happen, you probably don't have python installed or it's not in the search paths.
The process of compiling and filling the firmware and file system:
- Compiling the firmware
- Upload the firmware to ESP
- Compiling the file system
- Upload the file system to ESP
If you did everything correctly, the compilation should pass without errors, if they appear, try scrolling through and analyzing them. Most likely, VSCode will highlight problem areas with yellow or red wavy lines and scrolling will show details and numbers of problem lines in the corresponding files. Often the problem is in the Cyrillic alphabet in the path or in the code, such characters as (a, o, k, etc.) often fall into the wrong layout. If it doesn't work out then contact the telegram group https://t.me/IoTmanager, try to indicate in the message what version you are building, what you changed, and give the errors that came out.
If VSCode is experiencing problems with detecting and filling the firmware, check if the module is connected correctly and if there are any open terminal programs on your computer. On some modules, it is necessary to close GPIO0 to ground before flashing, if this is not implemented on the module. Also, on some modules, you need to restart it between loading the firmware and the file system.
The sequence of filling the firmware and file system is not important and sometimes it is even recommended to fill the file system first.
Bywet that in PROJECT TASKS there is no item Platform and its daughter items for working with the file system. Try to build the firmware first by clicking Build and update the project by clicking on the board version a couple of times. If this does not help, you can do everything via the command line. Log in to the Terminal by clicking on the icon with a square and an angle bracket inside at the bottom. Insert commands for your board and press Enter.
Erase Flash:
platformio run —target erase —environment esp32_4mb
Build Filesystem Image:
platformio run —target buildfs —environment esp32_4mb
Upload Filesystem Image:
platformio run -t uploadfs —environment esp32_4mb
and you can continue with the others as well
Build:
platformio run —environment esp32_4mb
Upload and Monitor:
platformio run —target upload —target monitor —environment esp32_4mb
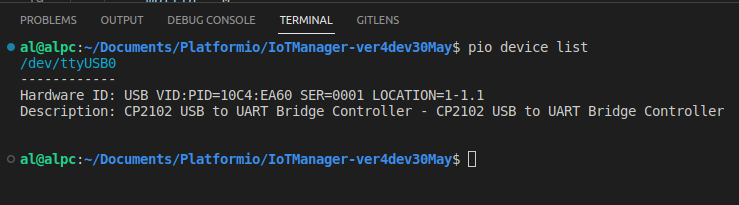
Sometimes Platformio can't flash your board because it can't see it.
Log in to the Terminal and enter
pio device list
to see that the card is connected
After successful compilation and firmware, go to the device http://ip_your_device. If you did everything correctly and registered your wi-fi network and password, then the IP address should be issued by your router. You can find it either on your router or in the terminal window.
If you missed this step for some reason, you will create an IoTmanager Wi-Fi access point with the admin|admin login parameters.
If you don't see the IoTmanager devices and access points, but an access point named ESP***** appears , then for some reason the file system is not flashed, try re-flashing it.